
Here's what you'll need to make this card:
- Cardstock cut to 4 1/4 x 8 1/2" and score at 4 1/4" for the base of your card
- (2) Cardstock cut to 3 1/2 x 3 1/2" - you'll want to change the color of these pieces. I'll give the measurements for the other pieces later.
- Double sided tape
- Sponge
- Ink
- Paper trimmer
- Stamping tools to finish the card

You will then cut this into rows of 1/2" thick. Be certain to keep the image in the order in which you've cut it. You can lay it on your bottom layer to keep it in check, or not. It does not matter as long as you keep the cuts in order.

Once you've made all your 1/2" rows, it's time to make the bricks. Begin with your top row and from left to right start cutting at 1/2" and then every 1" interval. Your last piece will be an inch. Again, lay them out and keep them in order.

On your second row cutting left to right again, start at 1" and cut every 1" interval. Your last piece will be only a 1/2". This is so your bricks are staggered.

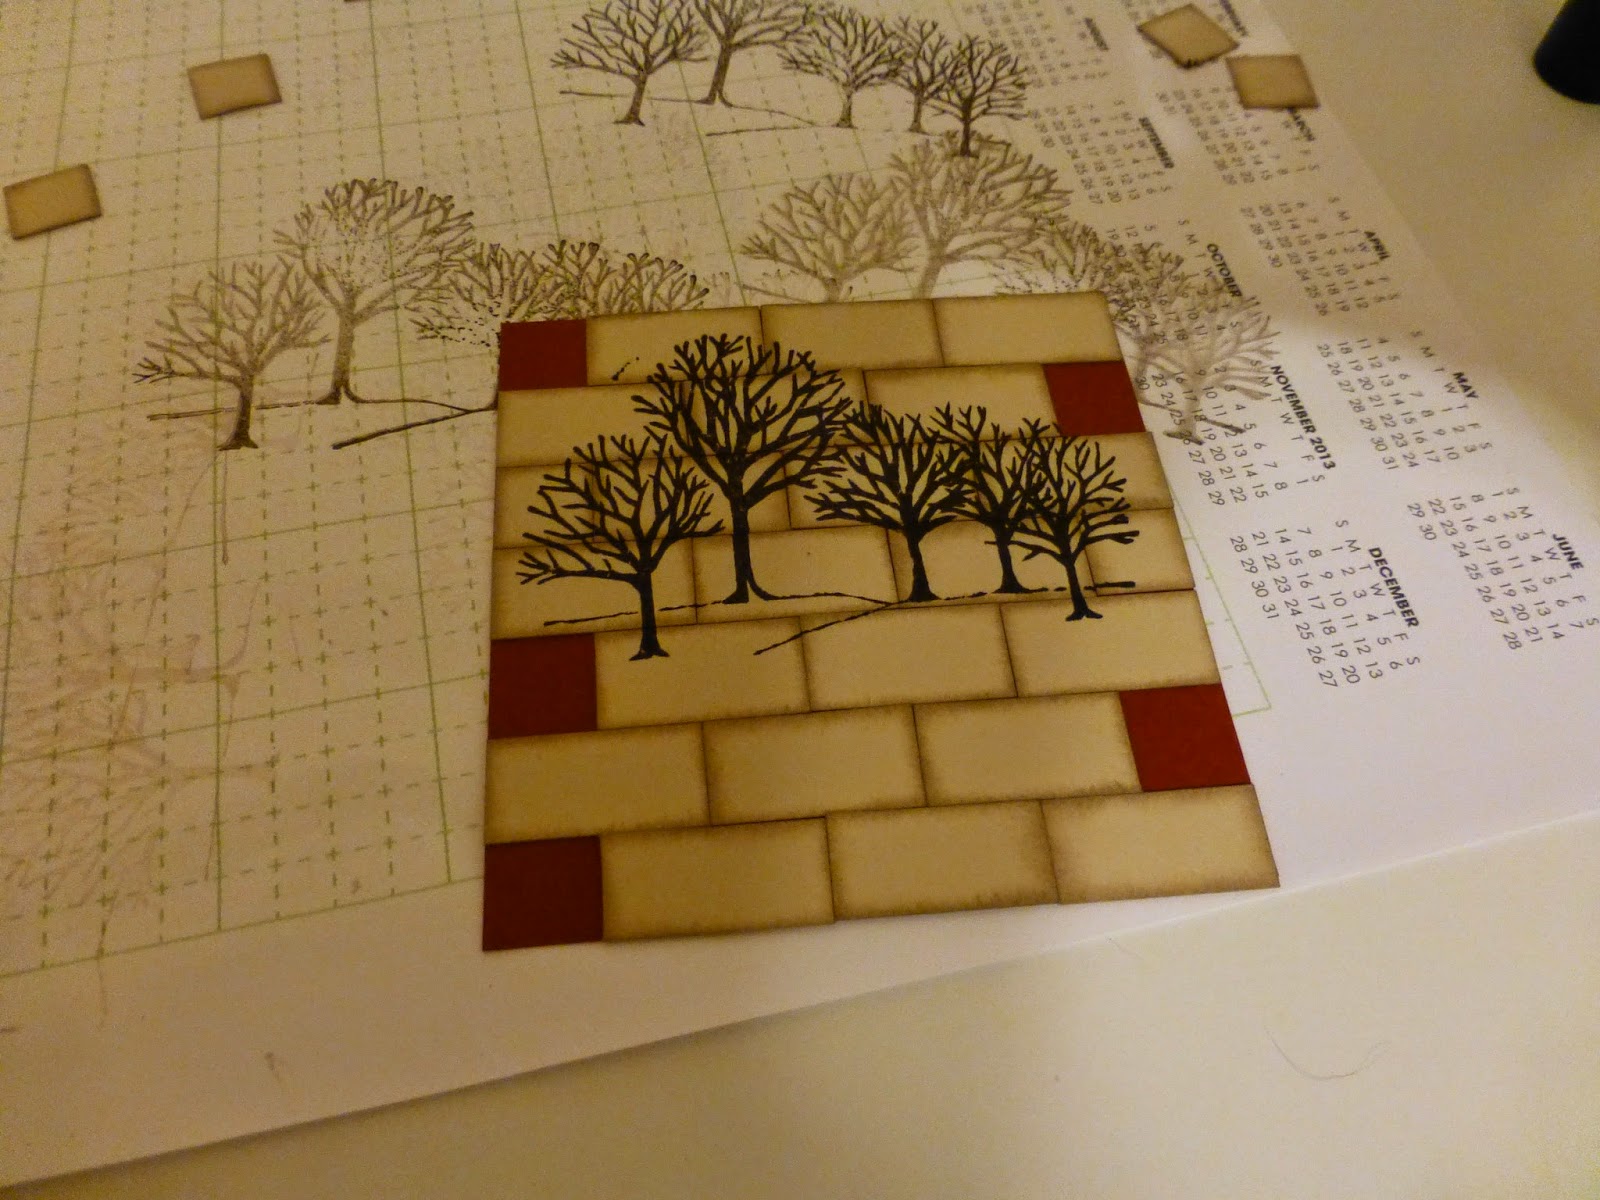
Rinse and repeat. At the end of this, you'll have something that will look like this:

Now it's time to create your mortar! Sponge every brick edge in ink and replace the brick back in the same order. This helps a lot in case you use an intricate image.


Now it's time to take a few bricks out of the pattern. It doesn't matter which bricks you choose as long as you're happy with the end result. I did take a piece out of mine that had the tiniest bit of the image stamped on it. I didn't feel it detracted from the image.

Next we glue everything down! Start with your largest piece at an edge and glue it down. After that, you'll be able to butt against the glued down piece to keep your rows and image lined up straight.

Once you've completed that task, you should have something that looks like this:
You'll want to take this piece and layer it on a piece of paper measuring 3 5/8 x 3 5/8". Use any color you like. This is also when you will want to add ribbon.
After that I layered that stack on a piece of cardstock, the same color under my bricks, that was cut to 4 1/8 x 4 1/8".
It's not a difficult technique, but it is time consuming. It's your turn to try it now! I hope you enjoyed today's technique. Thanks for popping by, Crafters! I'll see ya soon!
No comments:
Post a Comment